In this tutorial series I will show you how to create an RPG using the HaxeFlixel game framework.
If you haven't heard of HaxeFlixel before, you should first read my introduction post, which also has installation instructions.
This series will cover most major aspects of HaxeFlixel and help you get acquainted with this tool.
In this part we're going to create the base project for our game, crate a simple menu and make it possible to switch between states.
Start by creating a new project using one of the HaxeFlixel templates. I'm using FlashDeveloper as my IDE for this project.
The IDE you're using will generate a project tree for you based on the HaxeFlixel template. I described the structure of the generated project in the introduction HaxeFlixel tutorial.
Start by going to the MenuState.hx class, which represents the Main Menu state. This is the state that is launched initially. The initial state can be changed to something else in the Main.hx class, but we'll leave it as it is for now.
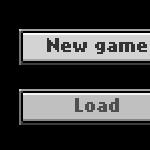
I'm going to add 2 buttons to the state, labeled "New game" and "Load".
HaxeFlixel employs a UI system which allows us to easily create simple UI components like buttons. The appearance of these components is customizable, but each control has a default skin, so you can use them as they are.
In this case we are going to create 2 FlxButton instances and add them to the screen using the add() method.
I will also add click handlers to both of the buttons. In the click handler of the "New game" button I'll call the static switchState() method of the FlxG class, which will change the current state to PlayState.
override public function create():Void

{

	super.create();


	var init_x:Int = Math.floor(FlxG.width / 2 - 40);


	var btn_new = new FlxButton(init_x, 50, "New game", onNew);

	var btn_load = new FlxButton(init_x, 80, "Load", onLoad);


	add(btn_new);

	add(btn_load);

}


private function onNew():Void {

	FlxG.switchState(new PlayState());

}


private function onLoad():Void {

	trace("Load...");

}
If you test your game now, you'll see two buttons. Clicking the first button leads to the next state (PlayState), which is empty right now.
You'll also notice that the resulting buttons are too small. Let's change the zoom level of the game to enlarge all the graphics.
Go to the Main.hx class now. At the top of the class you'll see a list of variables, which are used to tweak the appearance of the game. The first vars you'll notice are gameWidth and gameHeight. These values represent the width and height of the actual game screen, but not the window. The window size is set in the project.xml file.
The game screen size can differ from the window size, because Flixel will stretch your game screen based on the zoom level, which is also defined in this class.
Set the gameWidth and gameHeight values to halves of their initial values. Set the zoom level to 2. This will make all the graphics 2 times bigger.
var gameWidth:Int = 320; // Width of the game in pixels (might be less / more in actual pixels depending on your zoom).

var gameHeight:Int = 240; // Height of the game in pixels (might be less / more in actual pixels depending on your zoom).

var initialState:Class = MenuState; // The FlxState the game starts with.

var zoom:Float = 2; // If -1, zoom is automatically calculated to fit the window dimensions.

var framerate:Int = 60; // How many frames per second the game should run at.

var skipSplash:Bool = false; // Whether to skip the flixel splash screen that appears in release mode.

var startFullscreen:Bool = false; // Whether to start the game in fullscreen on desktop targets
If you test the game now, you'll see that the buttons are now twice as big, thanks to the zoom level.
We will add a tilemap in the next part!